Skip to content




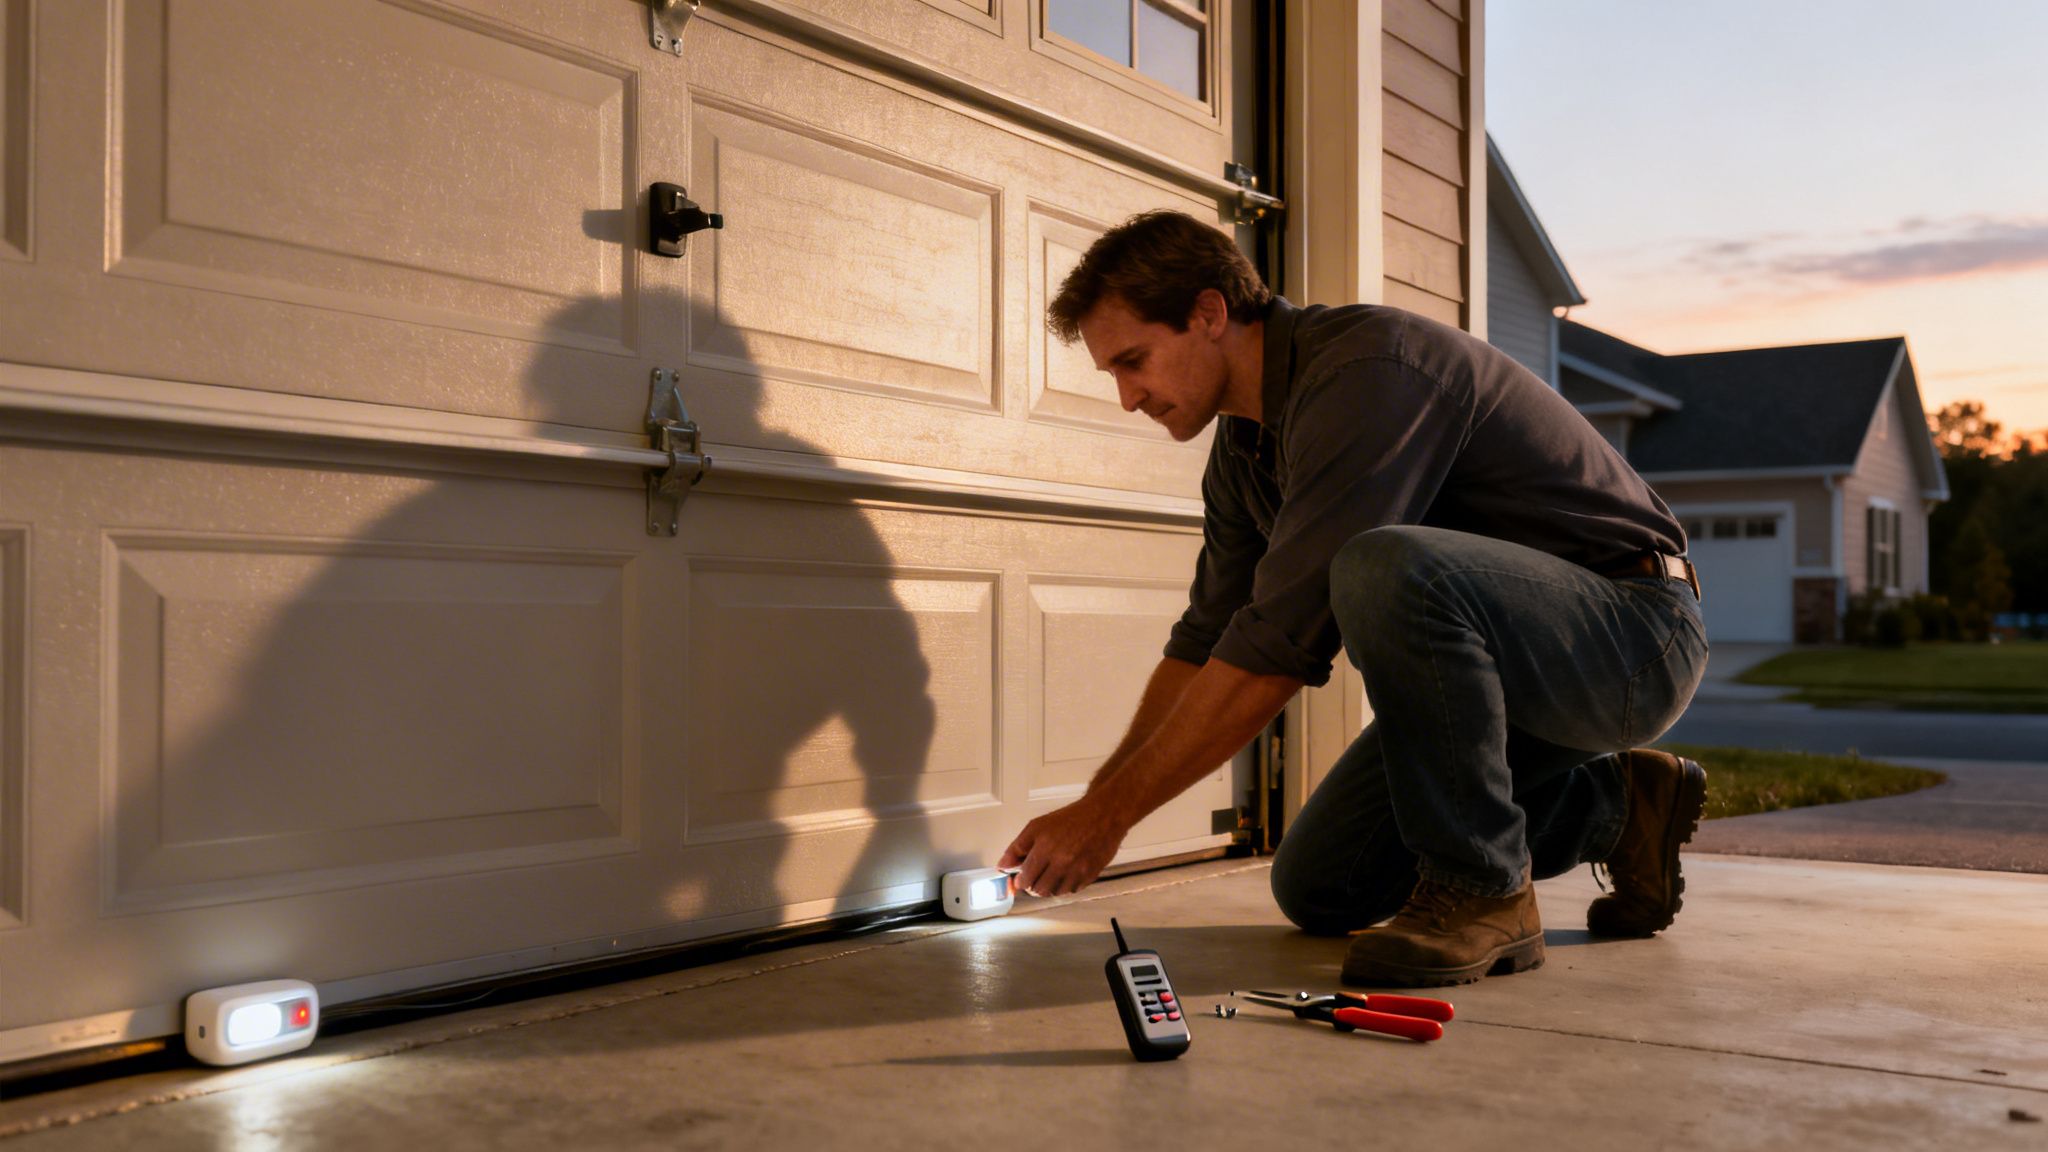
It's one of those moments that makes every homeowner groan. You hit the button to close the garage, and the door just… won't. It starts to go down, then jerks right back up. Before you start imagining worst-case scenarios and expensive repair bills, take a deep breath. Most of the time, the fix is surprisingly simple and something you can figure out in just a few minutes.
Your First 5 Minutes: What to Check Right Now
Let's not jump to conclusions. We're going to start with the basics—the kind of simple checks that solve the problem more often than you'd think. Think of it as the "is it plugged in?" step for your garage door.
You don't need to grab your toolbox yet. This is all about a quick visual inspection to rule out the most common culprits.
Start With a Quick Visual Sweep
Your first move is just to use your eyes. Take a good look at the entire garage door area.
- Clear the Path: First things first, check the path of the door. Is there a stray rake, a bicycle, or a forgotten trash can in the way? The safety sensors near the floor are super sensitive, and even a small object can trigger them to reverse the door.
- Check the Power Source: It sounds almost too obvious, but it happens all the time. Look up at your garage door opener motor. Is the cord plugged firmly into the outlet? The vibrations from opening and closing the door can sometimes jiggle a plug loose.
- Test the Controls: Walk over to the button on the wall and try closing the door from there. If it works just fine, but your remote doesn't, you've probably found the issue. A dead battery in your remote is a common and easy fix.
This flowchart is a great way to visualize these first few steps. It's all about checking the simple stuff before you get worried.
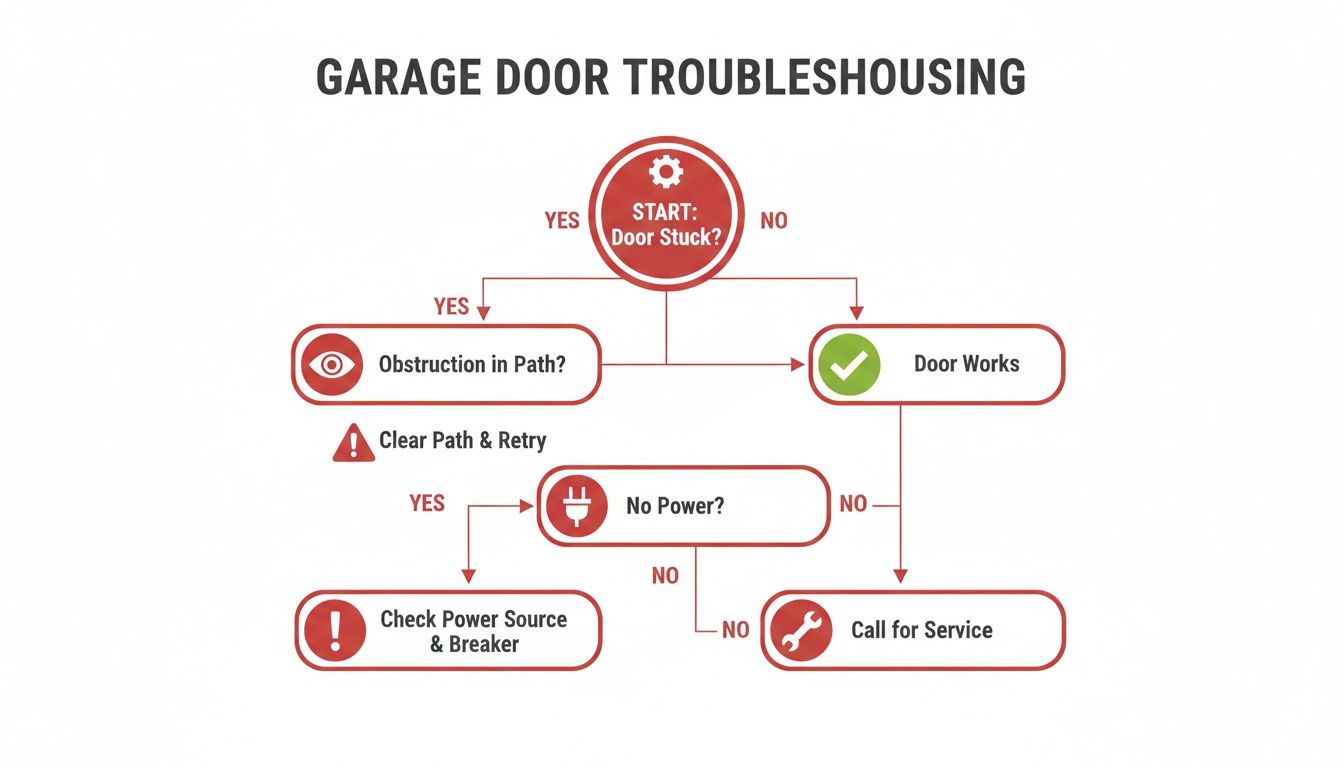
As you can see, checking for obstructions and confirming power are always the first things you should do.
Sometimes, a quick rundown of the most common issues is all you need. I've put together a simple table to guide you through those first few minutes of troubleshooting.
Quick 5-Minute Safety Checklist
| Check Area | What to Look For | Simple Fix |
|---|---|---|
| Door Path | Toys, tools, yard debris, or anything under the door. | Remove the object. |
| Safety Sensors | Blinking lights, dirt/cobwebs on the lens, misalignment. | Wipe lenses clean; gently adjust until lights are solid. |
| Opener Power | Unplugged or loose power cord. | Ensure the cord is plugged in securely. |
| Remote/Wall Button | Does the wall button work but the remote doesn't? | Replace the batteries in the remote. |
Think of this as your first line of defense. Running through these checks can often solve the problem without any further hassle.
Why These Simple Checks Are So Important
Trust me, you're not alone in this. That moment of frustration is shared by millions. The global garage door repair market is on track to become a $7 billion industry by 2033. And what's really telling is that a massive chunk of service calls—around 70% of them—are for issues like misaligned safety sensors or worn-out springs that prevent the door from closing properly.
By spending a few minutes on these checks, you're tackling the most frequent offenders first, which could save you the cost and wait for a professional service call.
Pro Tip: If you see the little LED lights on your safety sensors blinking, that's the system telling you exactly where the problem is. It means they're either blocked or not pointed directly at each other. We'll get into how to align them perfectly in the next section, but a blinking light is your best clue.
Running through these initial steps is a great start. If the door still refuses to close, you’ve at least narrowed down the possibilities. This kind of regular inspection is also a key part of good preventative care, which you can learn more about in our complete garage door maintenance checklist.
When Your Garage Door Safety Sensors Act Up
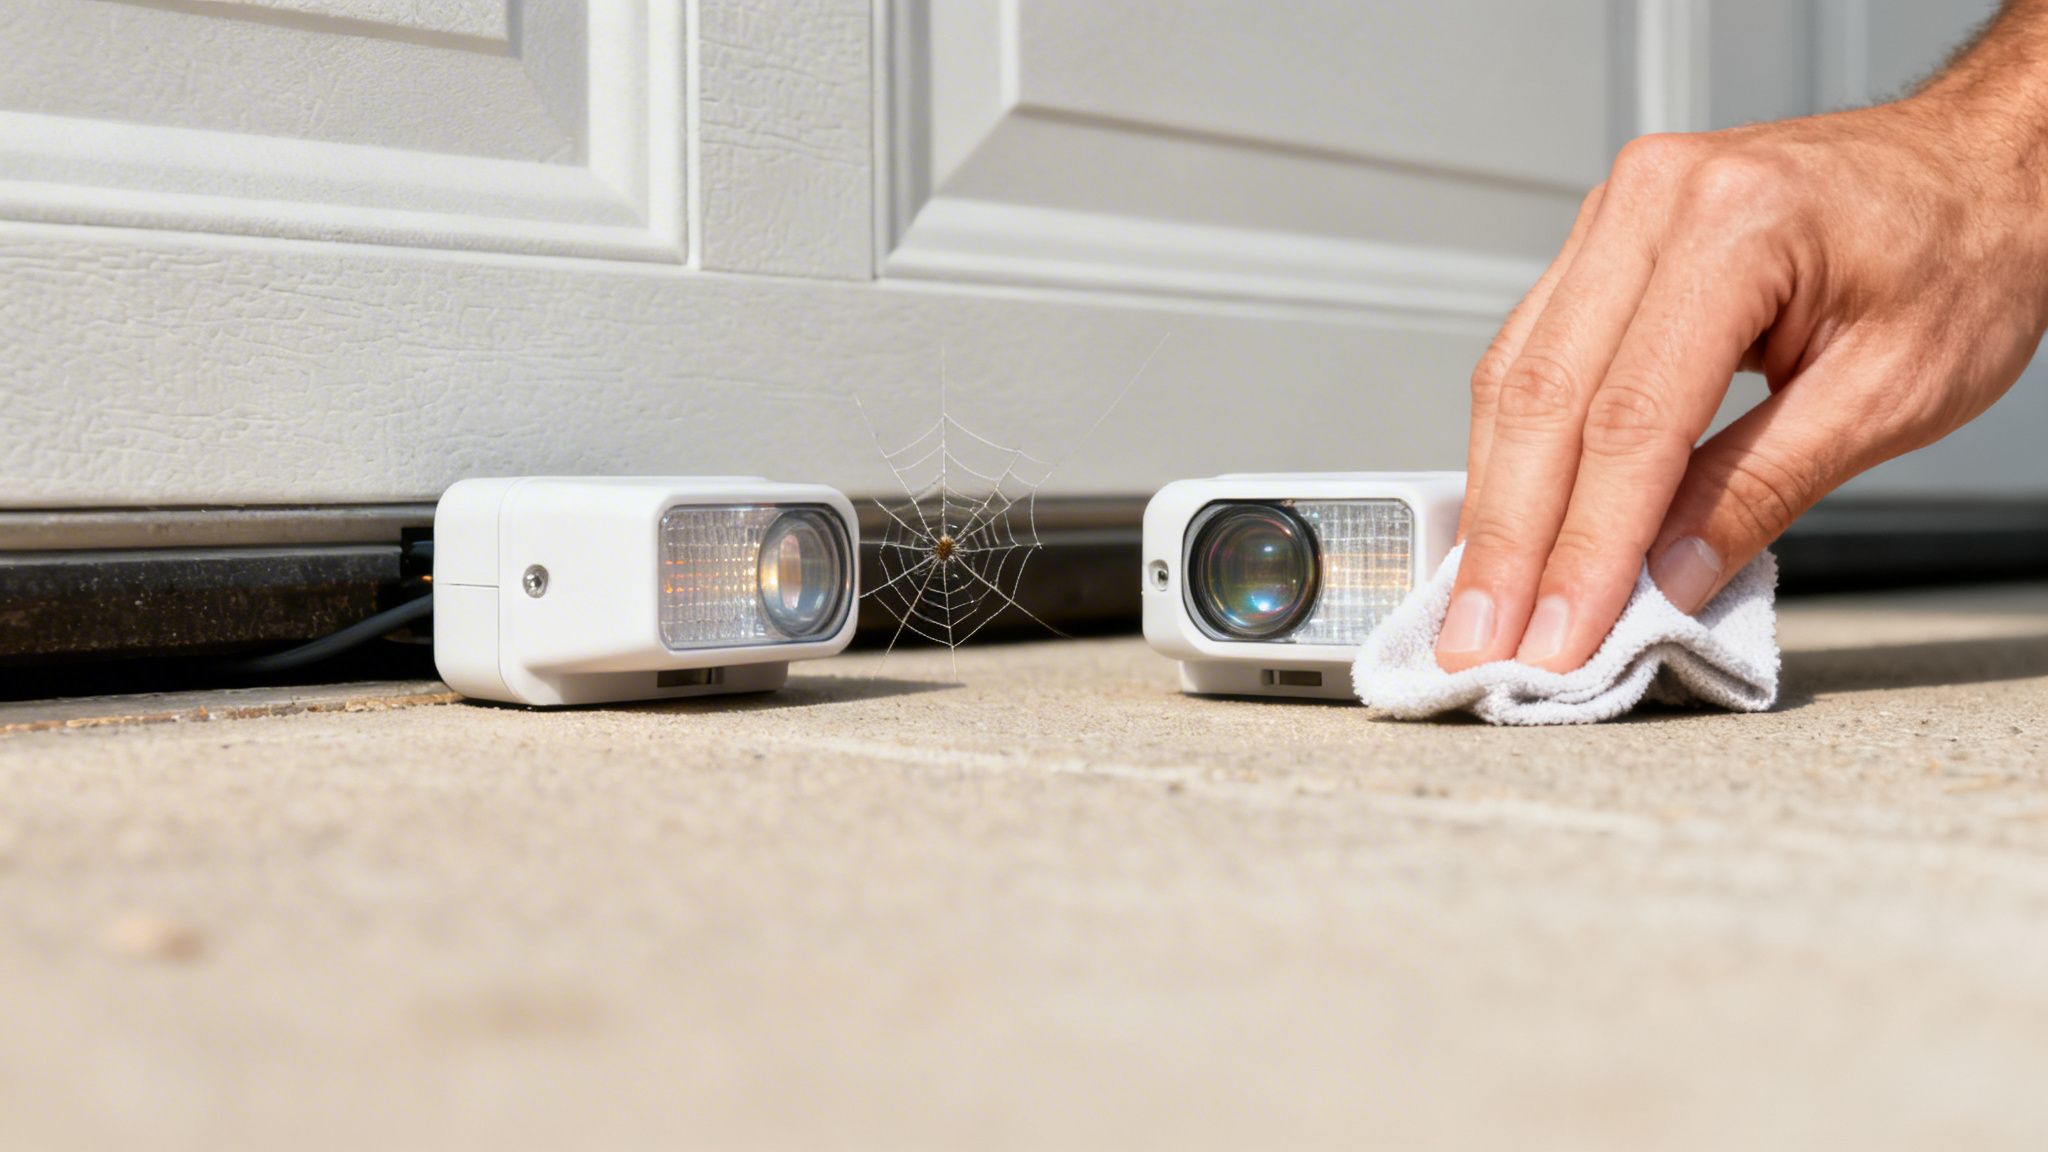
If your garage door starts to close, only to immediately reverse course and head back up, your safety sensors are the prime suspect. I’ve seen it a thousand times. These little "electric eyes," mounted a few inches off the floor on either side of the door frame, are doing their job—maybe a little too well. They project an invisible beam, and if anything breaks that connection, the door assumes something is in the way and refuses to close.
Honestly, this is the number one reason a modern garage door will not shut. Learning to troubleshoot the sensors yourself can easily save you a service call fee.
This safety feature has been mandatory in the U.S. since 1993, and for good reason. It’s estimated that these sensors are the main reason about 50% of garage doors reverse instead of closing on an obstacle. The safety impact is huge—these simple devices have helped slash garage door-related injuries by an estimated 80%. The industry reflects this importance, with the overhead door market projected to become a $7.17 billion business by 2026, and North America holding a 35% share of that.
What the Little Lights Are Telling You
The key to a quick diagnosis is understanding the small LED lights on the sensors themselves. While the exact colors might differ between brands like Chamberlain or Genie, the logic is universal.
- Solid Lights on Both Sensors: This is the goal. It means the sensors are perfectly aligned and nothing is blocking their path. If your door still won’t close with solid lights, the problem is somewhere else.
- One or Both Lights are Blinking (or Off): Bingo. This is your sign that the invisible beam is broken. The sensors can't "see" each other, triggering the safety reverse. A blinking light is the system's way of screaming, "The problem is down here!"
How to Get Those Sensors Working Again
Once you spot that blinking light, you can usually solve it in just a few minutes. The cause is almost always one of two things: something is in the way, or the sensors got bumped out of alignment.
First, Check for Obstructions
Before you start fiddling with the sensors, do a quick visual sweep of the area between them. It’s often something surprisingly simple.
- Obvious Blockages: Look for things like a misplaced shovel, a recycling bin, or a kid's toy. Even a single leaf can be enough to break the beam.
- Dirty Lenses: The sensor "eyes" can get covered in dust, smudges, or even spiderwebs. A quick wipe with a soft, clean cloth is often all it takes.
- Pesky Sunlight: Direct, bright sunlight hitting one of the sensors can sometimes blind it, especially at certain times of day. Try shading the sensor with your hand for a moment to see if the light goes solid. If it does, you've found your culprit.
Next, Check the Alignment
These sensors need to be pointed directly at one another. It doesn't take much to knock them out of whack—a bump from a lawnmower or a stray basketball is all it takes.
Look for the sensor with the blinking or unlit LED. You can usually make small adjustments by hand. Some have a wingnut on the bracket that you can loosen slightly to reposition it. Gently move the sensor up, down, or side to side until its LED light becomes solid. Once both lights are solid and steady, you’re back in business.
My Go-To Trick: Have someone else push the close button from the wall panel while you're crouched by the sensor. As the door starts to move and then reverses, you can make tiny adjustments in real-time. The second you get it right, the light will turn solid and the door will continue to close.
Fixing sensor issues is a great DIY win. But if you’ve tried everything and just can't get those lights to stay solid, don't let it drive you crazy. For a more detailed guide, you can check out our guide on how to align garage door sensors which breaks it down step-by-step.
Checking the Garage Door Tracks and Rollers
If the safety sensors get the all-clear, your next step is to examine the physical components that guide your door. Is your garage door making a racket, shuddering, or looking uneven as it tries to close? That’s a good sign the problem lies with the tracks or rollers. Think of it as a train on a track—if the rails are bent or the wheels are shot, that train isn't going anywhere.
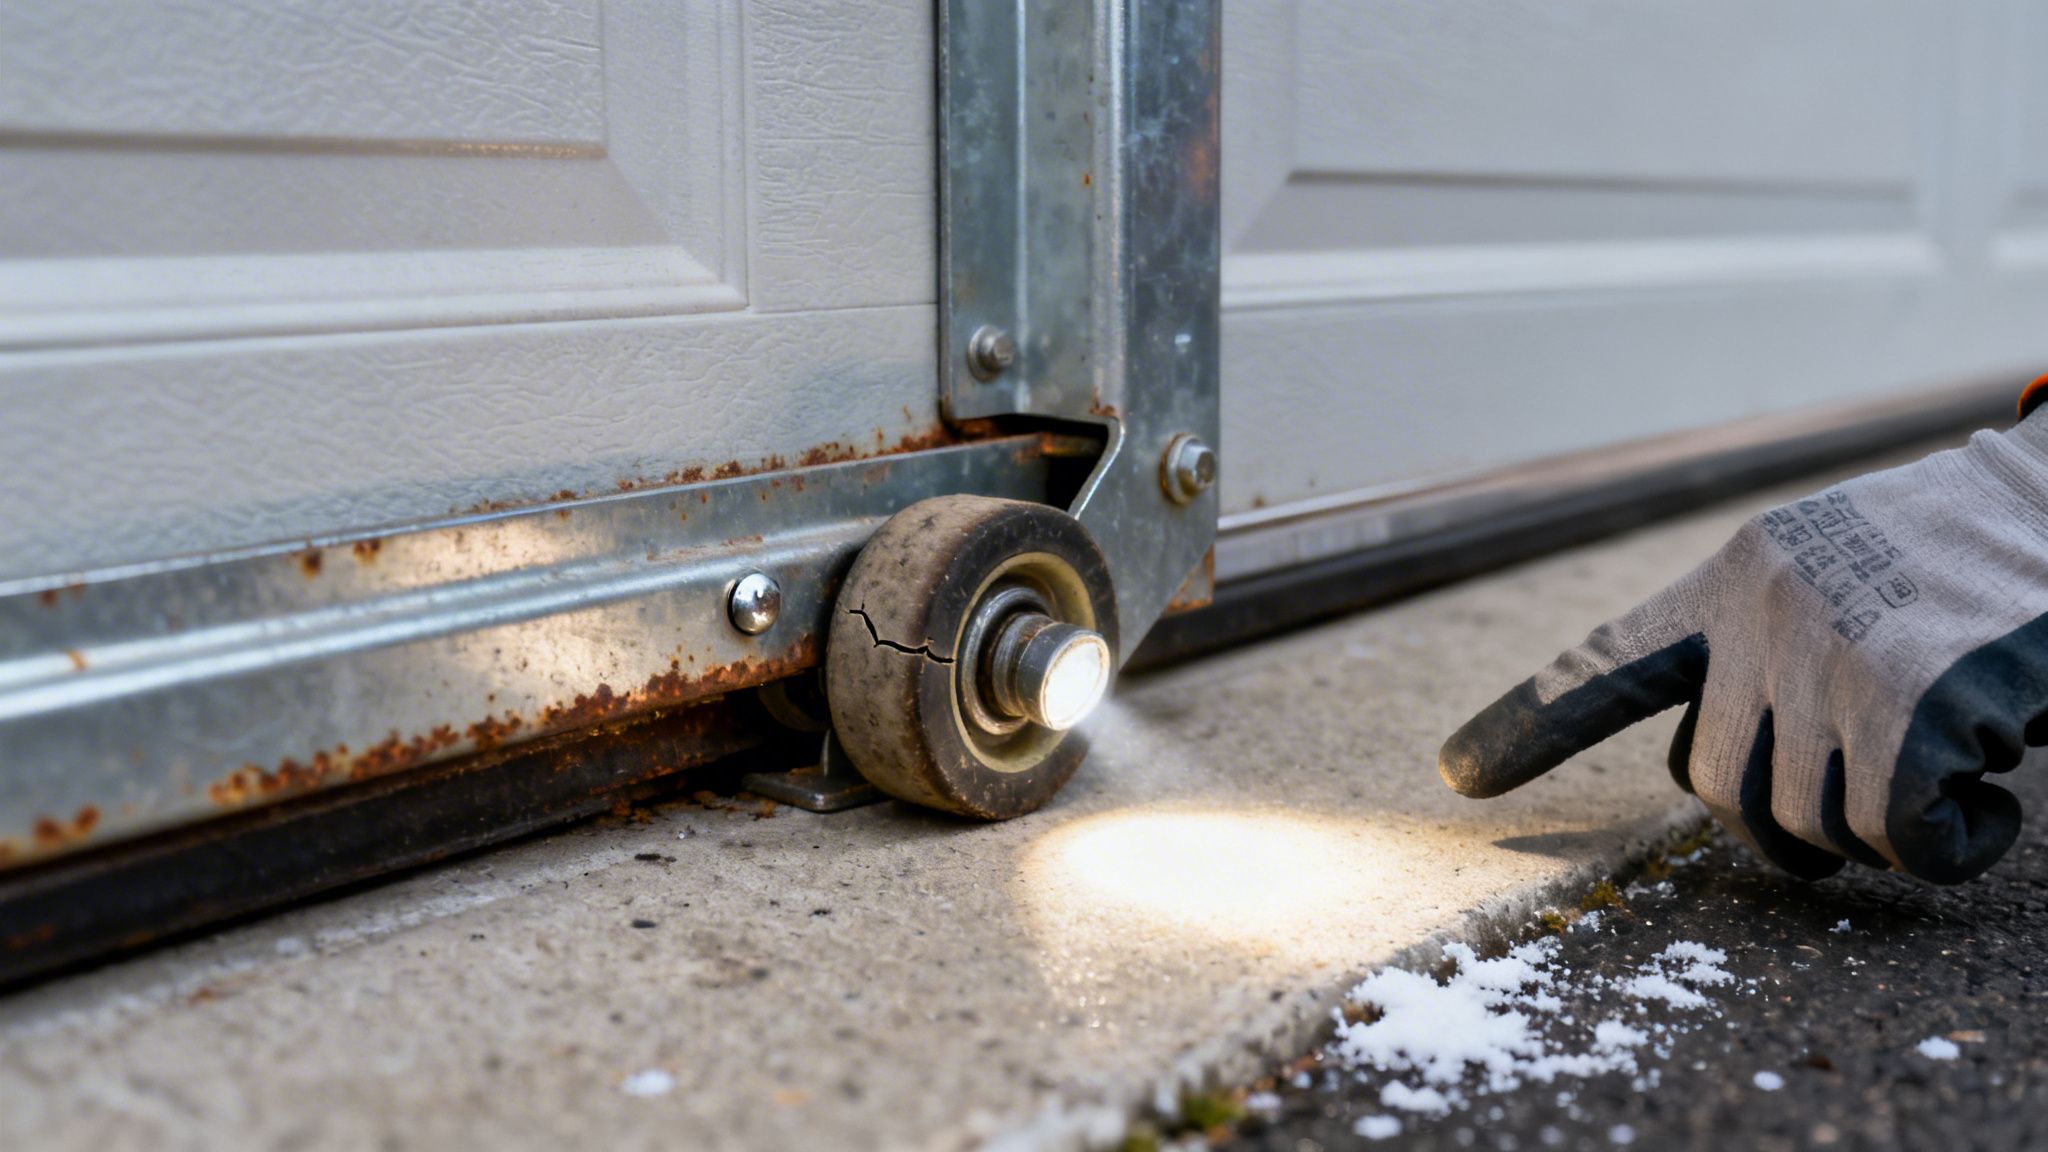
These parts take a real beating, especially around Northeast Ohio where the humidity and winter road salt can really speed up rust and decay. A quick visual check now can prevent a massive repair bill down the road.
Finding Trouble on the Tracks
Start by just looking at the metal tracks running up both sides of your door. Safety first: never, ever stick your fingers in the tracks, especially while the door is operating. Your eyes are all you need for this.
You're searching for anything that would block the rollers. Grab a good flashlight; it's often the best tool for spotting subtle issues.
- Dents and Bends: Scan the length of the track for any bent sections. It's amazing how a small bump from the car bumper or a runaway lawnmower can crimp the metal just enough to jam a roller.
- Debris Buildup: Dirt, cobwebs, leaves, and grime can build up over time, creating a sludge that forces the rollers to grind their way through instead of gliding smoothly.
- Rust and Corrosion: Look especially closely at the bottom few feet of the tracks. This is where moisture and salt pool, causing rust that creates a rough, pitted surface and weakens the metal itself.
If you just find a lot of gunk, a good cleaning might solve the problem. We've put together a straightforward guide on how to clean your garage door tracks the right way. But if you spot deep dents or significant rust, that’s a job for a professional. Bending tracks back into perfect alignment is tricky, and a weakened track needs to be replaced entirely.
Recognizing Worn-Out Rollers
The rollers are the little wheels that actually move in the tracks, and they have a limited lifespan. I've seen countless cases where a garage door struggles to close simply because the rollers are shot. A bad roller can seize up completely, causing the door to get stuck or even jump the track.
A Pro's Perspective: Noise is the biggest giveaway for failing rollers. If your once-quiet door now squeals, groans, or makes a grinding sound, the rollers are begging for attention. Don’t put it off. A $10 roller replacement today can save you from a $500 emergency call when the door falls off its track tomorrow.
Here’s what to look for to see if your rollers are done:
- Visible Cracks: Nylon rollers can get brittle with age and start to crack. If you have steel rollers, check for rust and listen for grinding, which indicates the internal ball bearings have failed.
- Wobbling or Sloppiness: Watch a roller as the door moves. Does it spin cleanly, or does it wobble around in the track? That excessive play means the bearings are worn out.
- Flat Spots: A roller that gets jammed will be dragged instead of rolling, which grinds a flat spot onto its surface. This causes that tell-tale "ca-thunk, ca-thunk" sound and puts a ton of stress on the opener motor.
Ignoring worn-out rollers is a bad bet. When one fails, it puts extra strain on everything else, from the other rollers to the opener itself. If your rollers are cracked, rusted, or wobbly, it’s time to get them swapped out before they cause a much bigger problem.
Time to Check the Opener and Remote
Okay, so you've checked the sensors and the tracks, and everything looks good. Now, we're going to look at the brain of the operation: the garage door opener motor itself. This is the powerhouse doing all the heavy lifting, and sometimes, the reason your garage door will not shut has nothing to do with a physical blockage but everything to do with the opener's settings or a simple communication issue.
Let's start with a potentially easy win. Before you start fiddling with anything on the motor unit, just walk over to the wall-mounted button and press it.
If the door closes perfectly with the wall control but ignores your remote, you've likely found your culprit. This almost always points to a weak or dead battery in the remote. It's a simple, cheap fix that can save you a lot of headaches.
If both the wall button and the remote fail to close the door, the issue is a bit deeper in the opener system.
Adjusting Your Door's Travel and Force Limits
This sounds more technical than it is, I promise. Your garage door opener relies on two critical settings: travel limits and force limits.
Here’s an easy way to think about them:
- Travel Limits: These settings tell the door precisely where to stop when it's fully open and fully closed.
- Force Limits: This dictates how much pressure the door can apply before it decides something is in the way and reverses.
These are usually set during installation, but they can get out of whack over time. Temperature changes, especially the wild swings we see around here, can cause the door and its parts to expand and contract. That tiny shift can be just enough to make the opener think it's hit the floor before it actually has, triggering the safety reversal.
In fact, faulty openers and misaligned tracks are a top complaint, accounting for 60% of service calls in the residential market. This is a big business—the industry was valued at over $4.78 billion globally in 2022. Here in the snowy Cleveland suburbs, older doors are especially prone to these issues. Statistics show 40% of doors over 10 years old have failures related to worn-out parts and miscalibrated openers.
How to Tweak the Down Travel Limit
If your door gets almost to the floor and then suddenly reverses, the "down" travel limit probably needs a tiny adjustment. Most modern openers from brands like Chamberlain, LiftMaster, and Genie have adjustment screws or buttons right on the motor unit.
You'll usually see two dials, one for the "up" limit and one for the "down" limit, often marked with arrows.
- Find the Controls: Look on the side or back of the motor unit hanging from your ceiling. You’re looking for two small plastic screws or a set of buttons.
- Make a Small Adjustment: To get the door to travel a bit further down, you’ll need to adjust the "down" limit. This usually just means a small turn of the screw—often a quarter-turn is plenty—in the direction that increases travel.
- Test and Repeat: After each tiny tweak, run the door. You want the bottom weatherstripping to create a nice, light seal with the floor. If you go too far, the door might start to buckle or bow, so take it slow.
My Pro Tip: I can't stress this enough—make incredibly small adjustments. It’s so easy to overdo it. Turn the screw just a little, test the door, and then adjust again if you need to. Patience is your best friend here.
Understanding Limit Switches
These adjustments are directly tied to the opener's Limit Switches. These are the small electronic or mechanical parts inside the opener that tell the motor when the door has reached its preset open and close positions. They are absolutely critical for telling the motor when to stop. When you're troubleshooting, you're essentially recalibrating where these switches get triggered.
If you’ve tried adjusting the limits and the door is still acting erratically, it could signal a faulty limit switch, which is a more involved repair.
When Force Settings Are the Problem
What if the door reverses halfway down for no obvious reason? In this case, the force setting might be too sensitive. It could be interpreting the normal resistance of moving along the tracks as an obstruction.
Just like the travel limits, there's usually a "force" adjustment dial on the opener. A slight increase might be all that's needed to push through that minor resistance and close properly.
But be extremely careful here. If you set the force too high, you create a serious safety hazard because the door might not reverse when it actually hits something. After any force adjustment, you must perform a safety reversal test. Lay a 2×4 flat on the ground in the door's path. A properly working door should reverse the moment it touches the wood. If it doesn't, the force is too high and you need to dial it back immediately.
Knowing When to Put Down the Tools and Call a Pro
We've walked through a lot of fixes you can absolutely tackle yourself. Cleaning photo-eye sensors, clearing out the tracks, or even swapping out a remote battery are great DIY wins that can save you a service call fee. But a smart homeowner knows their limits.
Knowing when to step back is just as important as knowing how to troubleshoot. Some parts of your garage door system are genuinely dangerous, and trying to fix them without the right tools and training is a recipe for disaster. This isn't about giving up; it's about being smart and prioritizing your safety above all else.
The Absolute No-Go Zone: Springs and Cables
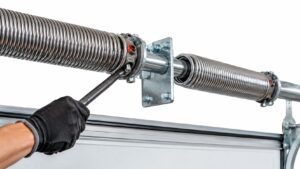
If you take one thing away from this guide, let it be this: do not mess with the garage door springs. I can't stress this enough. Whether you have the big torsion spring mounted on a bar above the door or the extension springs that run alongside the tracks, these components are under an incredible amount of tension.
They're essentially coiled-up powerhouses, storing the massive energy required to lift a 300-pound door with ease.
- Torsion Springs: The big, beefy spring you see on a metal shaft directly above the closed door. It stores an immense amount of kinetic energy.
- Extension Springs: The pair of smaller springs running parallel to the horizontal tracks. They stretch and recoil like massive rubber bands every time the door moves.
When a spring fails, you'll often hear a bang so loud it sounds like a gunshot went off in your garage. A broken spring can't be patched up; it has to be replaced entirely. Trying to adjust or replace one yourself without the proper winding bars and safety know-how is incredibly risky. The spring can release all its stored energy in an instant.
Safety Is Non-Negotiable: I've seen what happens when a torsion spring lets go. It can send shrapnel flying, shatter car windows, and cause devastating personal injury. If you see a distinct gap in your torsion spring or find a snapped extension spring lying on the floor, your door is officially out of commission. It’s time to call a professional.
The heavy-duty cables that work with these springs are under the same immense tension. If you see a frayed or snapped cable, the danger is just as real.
Other Red Flags That Mean "Call a Technician"
Beyond the springs and cables, a few other situations are clear indicators that a DIY fix is off the table. These issues often involve the structural integrity of the door or complex electrical components that pose a serious risk.
The Door Is Off Its Tracks
If you see that one or more of the rollers have popped out of the metal track, your door is in a seriously unstable position. An off-track door is a massive, heavy weight hanging precariously. Trying to muscle it back into place can damage the door panels, bend the tracks, or worse, cause the entire door to come crashing down.
You Have Cracked or Broken Door Panels
A single broken panel might look like a simple cosmetic problem, but it compromises the structural integrity of the whole system. A cracked panel can snag on its way up or down, putting a huge strain on the opener motor and other components, which can lead to a much bigger failure down the road. Replacing a panel isn't like swapping out a Lego brick; it requires carefully disassembling the door sections, which is a complex job best left to someone with experience.
There Are Electrical Problems with the Opener
This is another big one. If you notice a burning smell, hear a loud buzzing or humming noise from the motor unit, or see any sparks, unplug the opener from the wall immediately. These are all signs of a serious electrical malfunction, like a fried circuit board or a dying motor. Don't even think about taking the cover off to poke around inside.
DIY vs. Professional Repair Costs in Cleveland
When you're trying to decide whether to tackle a job yourself or call in an expert, cost is often a big factor. It’s true that you can save a good chunk of change on simple fixes. However, for the big, dangerous jobs, the cost of a professional is an investment in your safety and a guarantee that the job is done right.
Here's a look at how the costs typically break down for common garage door issues here in the Cleveland area.
| Repair Type | Typical DIY Cost | Estimated Professional Cost | Safety Risk |
|---|---|---|---|
| Sensor Cleaning/Alignment | $0 – $5 (cleaning supplies) | $100 – $175 | Low |
| Remote Battery Replacement | $5 – $10 | $100+ (for a service call) | Very Low |
| Track Cleaning | $0 – $10 (lubricant/cleaner) | $125 – $200 | Low |
| Torsion Spring Replacement | N/A – Do Not Attempt | $250 – $450 | Extreme |
| Cable Replacement | N/A – Do Not Attempt | $200 – $350 | High |
| Door Off-Track Repair | N/A – Do Not Attempt | $175 – $300 | High |
As you can see, the jobs marked "Do Not Attempt" are the ones with extreme safety risks. The potential for injury simply isn't worth the money you might save. For everything else, a little bit of your own time and effort can go a long way.
Common Questions About Garage Doors That Won't Shut
Over the years, I've helped countless homeowners figure out why their garage door is giving them grief. After a while, you start to hear the same questions pop up again and again. Let's tackle some of the most common head-scratchers with some quick, straightforward answers.
Why Does It Work With The Wall Button But Not My Remote?
This is probably the most frequent call I get, and thankfully, it's usually the easiest fix. If your wall-mounted button closes the door without a hitch but your remote is dead in the water, 99% of the time it’s just a dead battery. Pop a new one in, and you'll likely be back in business.
If that doesn't do the trick, the remote might have simply lost its connection to the opener. Each model has a slightly different process for re-pairing, but a quick look at your owner's manual will show you how to get them talking again.
What If The Door Stops Halfway But Doesn't Reverse?
When a door gets stuck partway down without immediately shooting back up, it's a huge clue. This usually points to a physical problem—something is binding or blocking the tracks. It's different from a sensor issue, which triggers that instant reverse.
This kind of stop means the opener is straining against real resistance, like a worn-out roller or a slight dent in the track. Its safety mechanism kicks in and shuts the motor down to avoid burning it out.
A garage door that won't close can feel like a major security risk. While you work on the problem, it’s a good idea to know how to secure your garage door to keep your home and family safe.
How Does Cold Weather Affect My Garage Door?
Ohio winters are brutal, and your garage door feels it too. Extreme cold makes metal contract, and that includes everything from the tracks and springs to the rollers. This shrinkage can create extra friction and make the door much harder to move.
Suddenly, the force settings on your opener that worked perfectly all summer aren't strong enough to push through the resistance. Lubricants also get thick and gummy in the cold, which only makes the problem worse.
If you've run through these common issues and are still stuck, it's time to call in a professional. The team at Danny's Garage Door Repair is ready 24/7 for fast, reliable service anywhere in the Cleveland area. You can get a free estimate by visiting us online at https://garagedoors101.com.